Building things with Large Language Models (LLMs) can feel complex, and I recently found myself navigating that complexity firsthand. I’ve been developing a new LLM powered project, and through that experience, I’ve uncovered some really helpful patterns and techniques. In this post, I want to share those learnings with you, focusing on the key components and how they fit together. Details about the specific project are still coming soon, but the insights I’ll be sharing are broadly applicable to anyone looking to build LLM-powered applications. Let’s dive into what I’ve learned!
Open WebUI
Given the project’s early stage, I’m prioritizing the core engine development over a custom UI. Therefore, I’m leveraging Open WebUI as the front-end. It provides a built-in chat interface capable of rendering AI chat elements, including Markdown and think tags – everything you would expect.
Using Open WebUI is a great starting point for LLM-powered applications, providing a functional chat interface and customizability out of the box.
Filters / Adapters
In Open WebUI there is a concept called filters that will allow you to customize the message you get from Open WebUI into a format of your liking. By default Open WebUI does not send things like user_id etc… If you are connecting to a traditional LLM the default may work.
If you are building something unique you may need to add more data to the payload or even customize the parameters that get sent to your engine. We can accomplish this by creating a simple script that will allow me to get exactly what I need from Open WebUI to pass into my engine.
def inlet(self, body: dict, __user__: Optional[dict] = None) -> dict:
        chat_id = body.get("chat_id")
    if chat_id is None:
            chat_id = body.get("metadata")["chat_id"]
    actor = {"identifier": __user__["id"], "source": "webui"}
    messages = []
    for i, message in enumerate(body["messages"]):
            new_message = message.copy()
            new_message["index"] = i
            messages.append(new_message)
    body["chat_id"] = chat_id
        body["actor"] = actor
        body["message"] = messages[-1]
        del body["messages"]
    return body

def outlet(self, body: dict, __user__: Optional[dict] = None) -> dict:
    return body
You can see the full code here: zacksiri/tama_adapter
Essentially this is a small python script that will take the traditional LLM input which follows the OpenAI format and convert it into an output like this:
{
  "chat_id": "some-thread-id",
  "actor": {
    "identifier": "unique-id-of-user",
    "source": "webui"
  },
  "message": {
    "role": "user",
    "content": "Hi!",
    "index": 0
  }
}
Since my engine will manage it’s own state, there is no need to pass the entire message thread in every time. I just need the new message passed in by the user from Open WebUI. The chat_id and actor.identifier will be enough to allow my engine to identify which message thread this is, and it can load it’s internal state to continue the conversation.
Admin Configuration
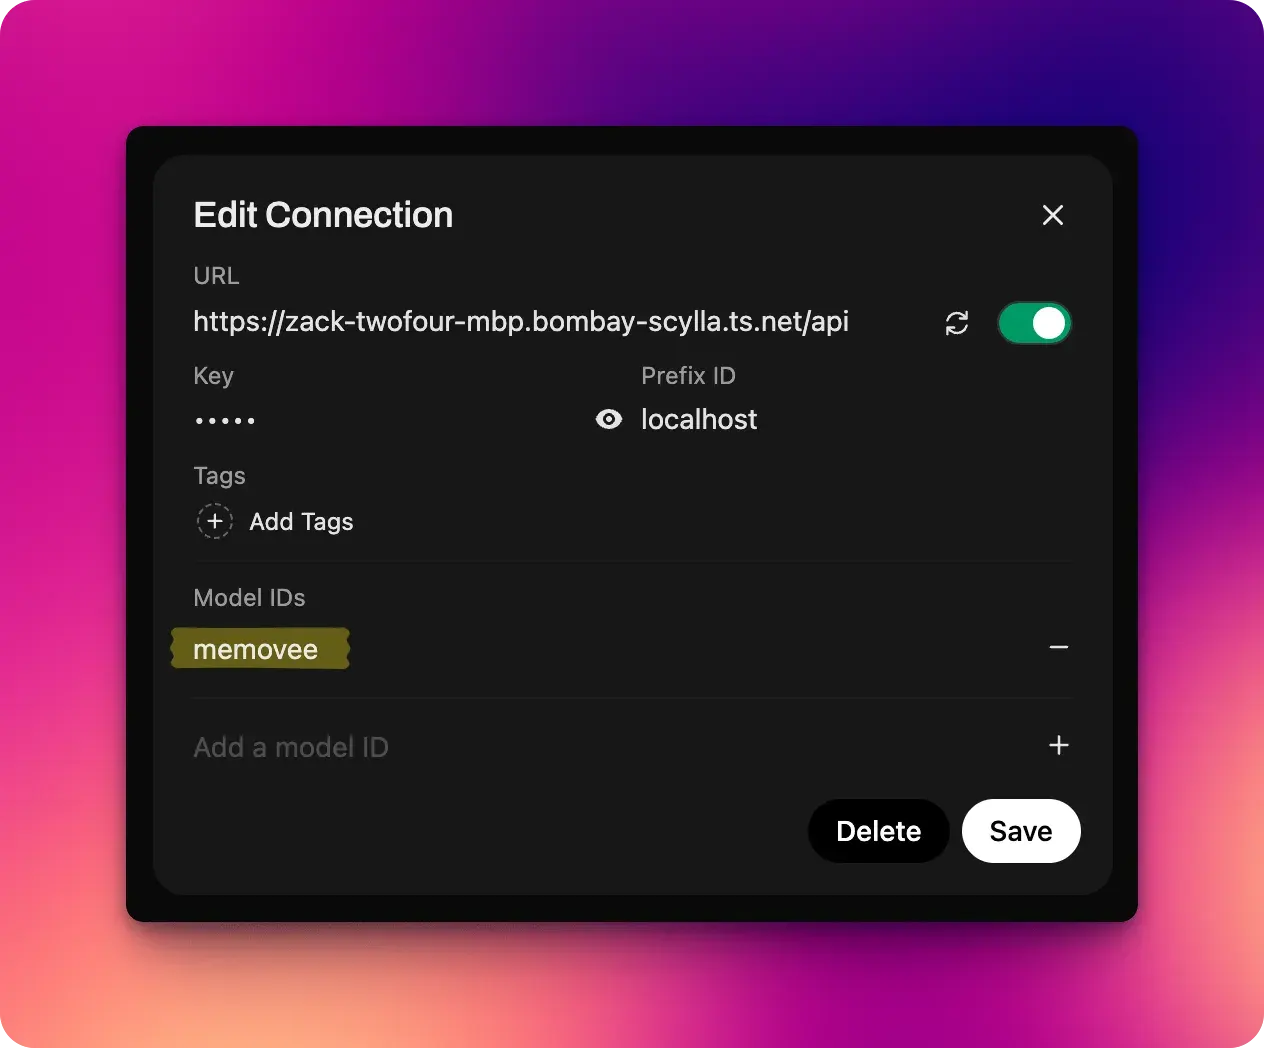
Once you add the adapter to your Open WebUI instance you can apply it by adding your application endpoint to the Connections screen.
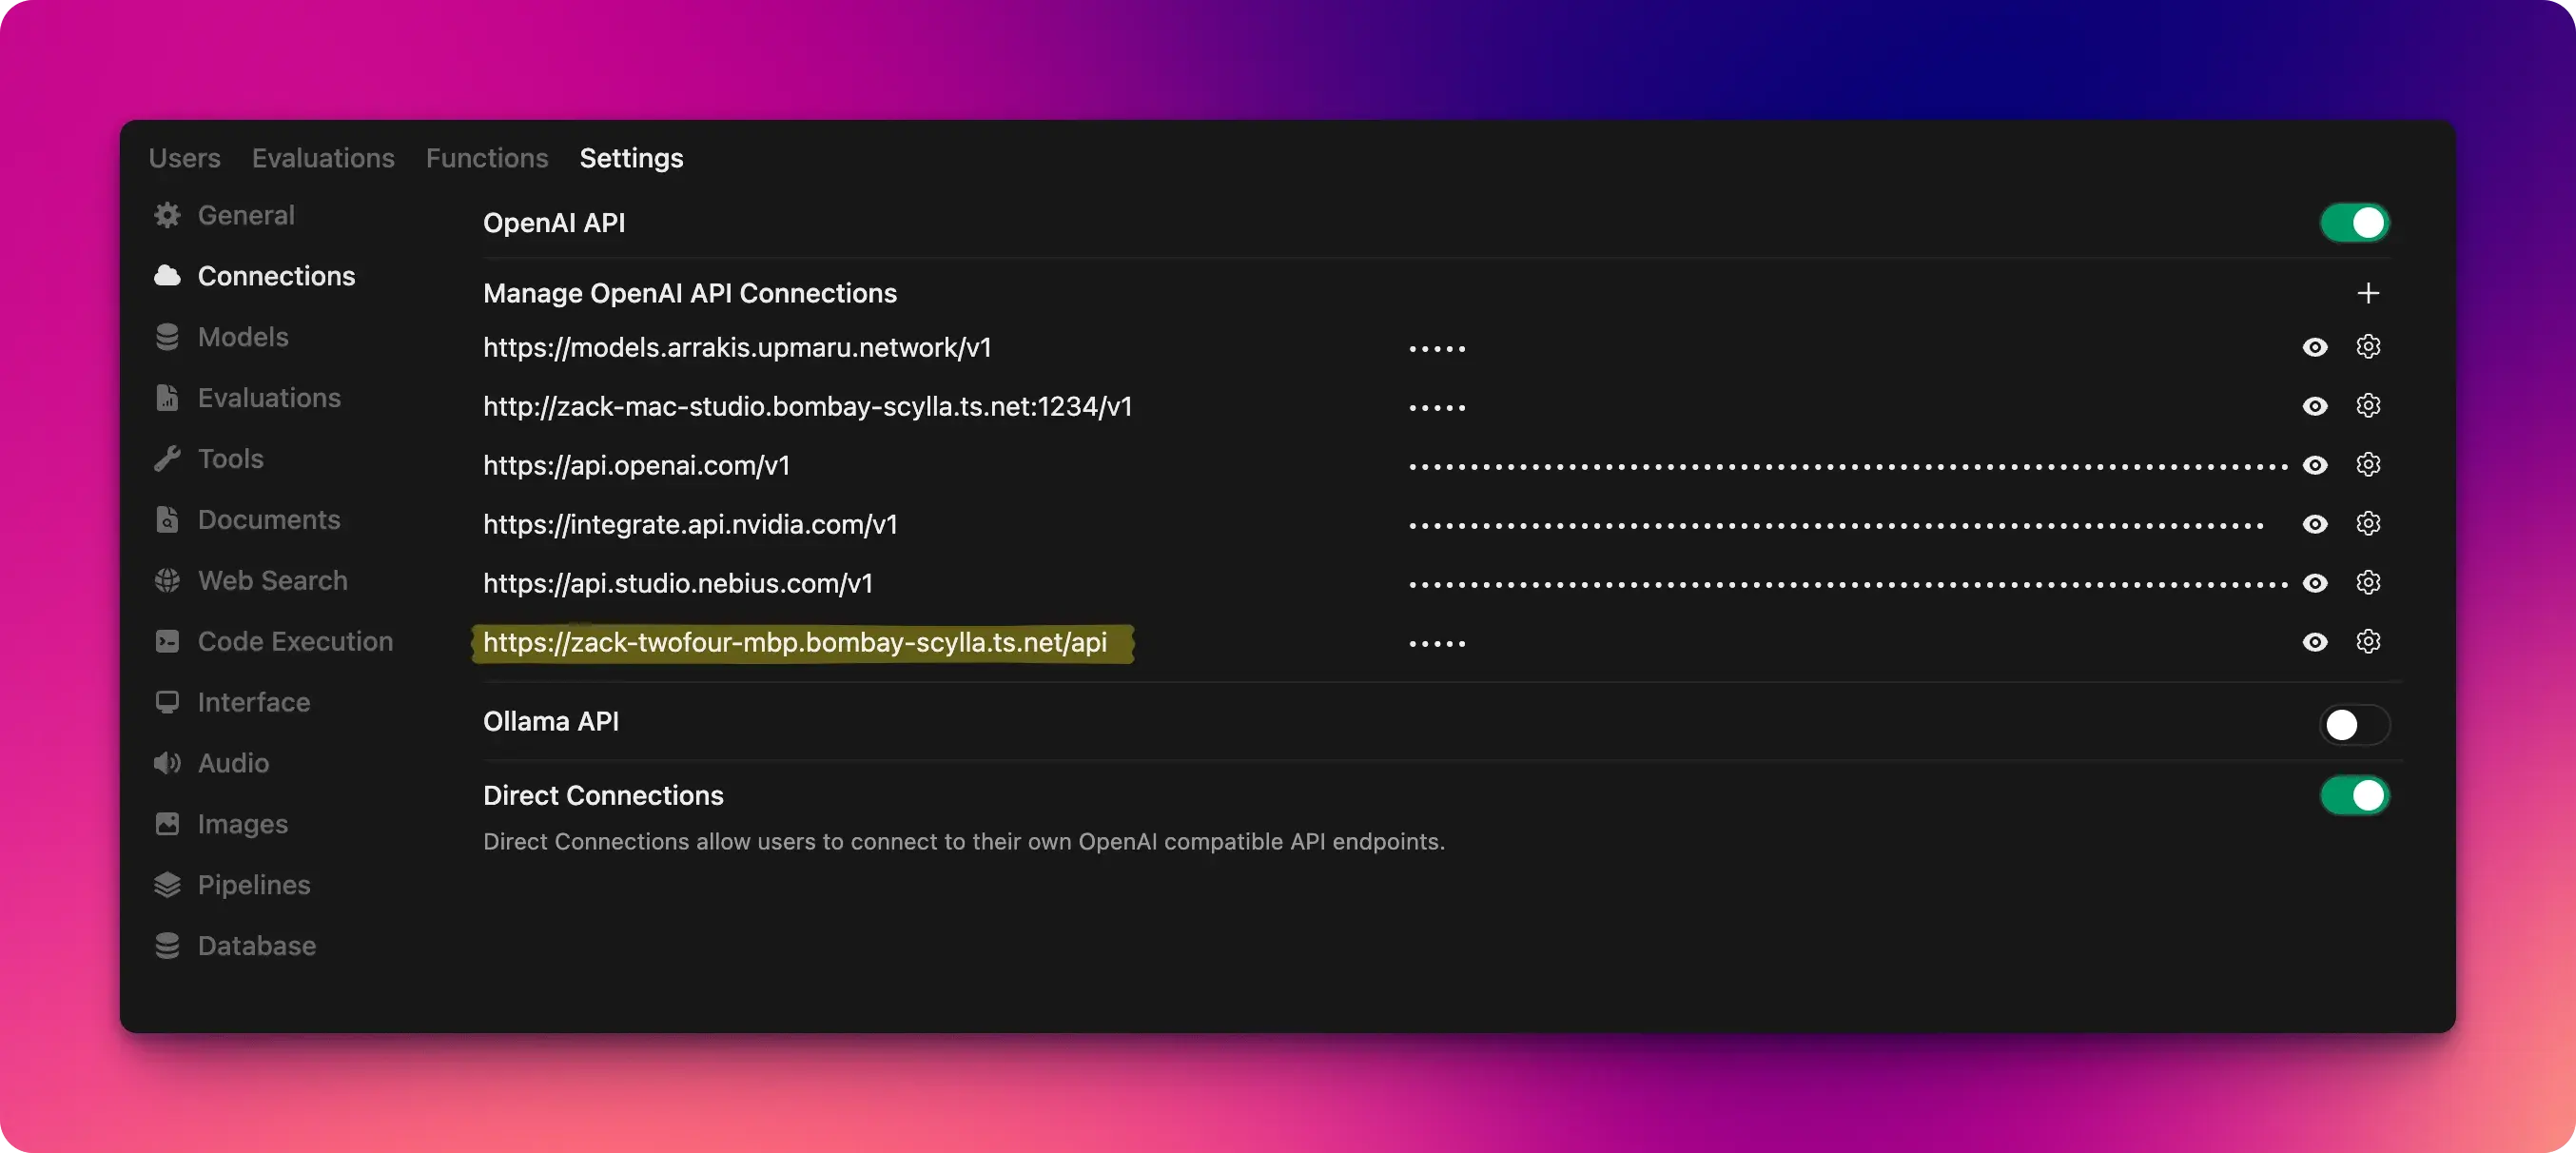
Once you added the connection, you will also need to add a model name. If you’re curious about what I’m using for the url it’s simply a tailscale url. I can expose my dev server on localhost:4000 over my tailnet by running tailscale serve localhost:4000
Workspaces
Open WebUI gives you the ability to add your own customization on top of existing models by creating workspaces.
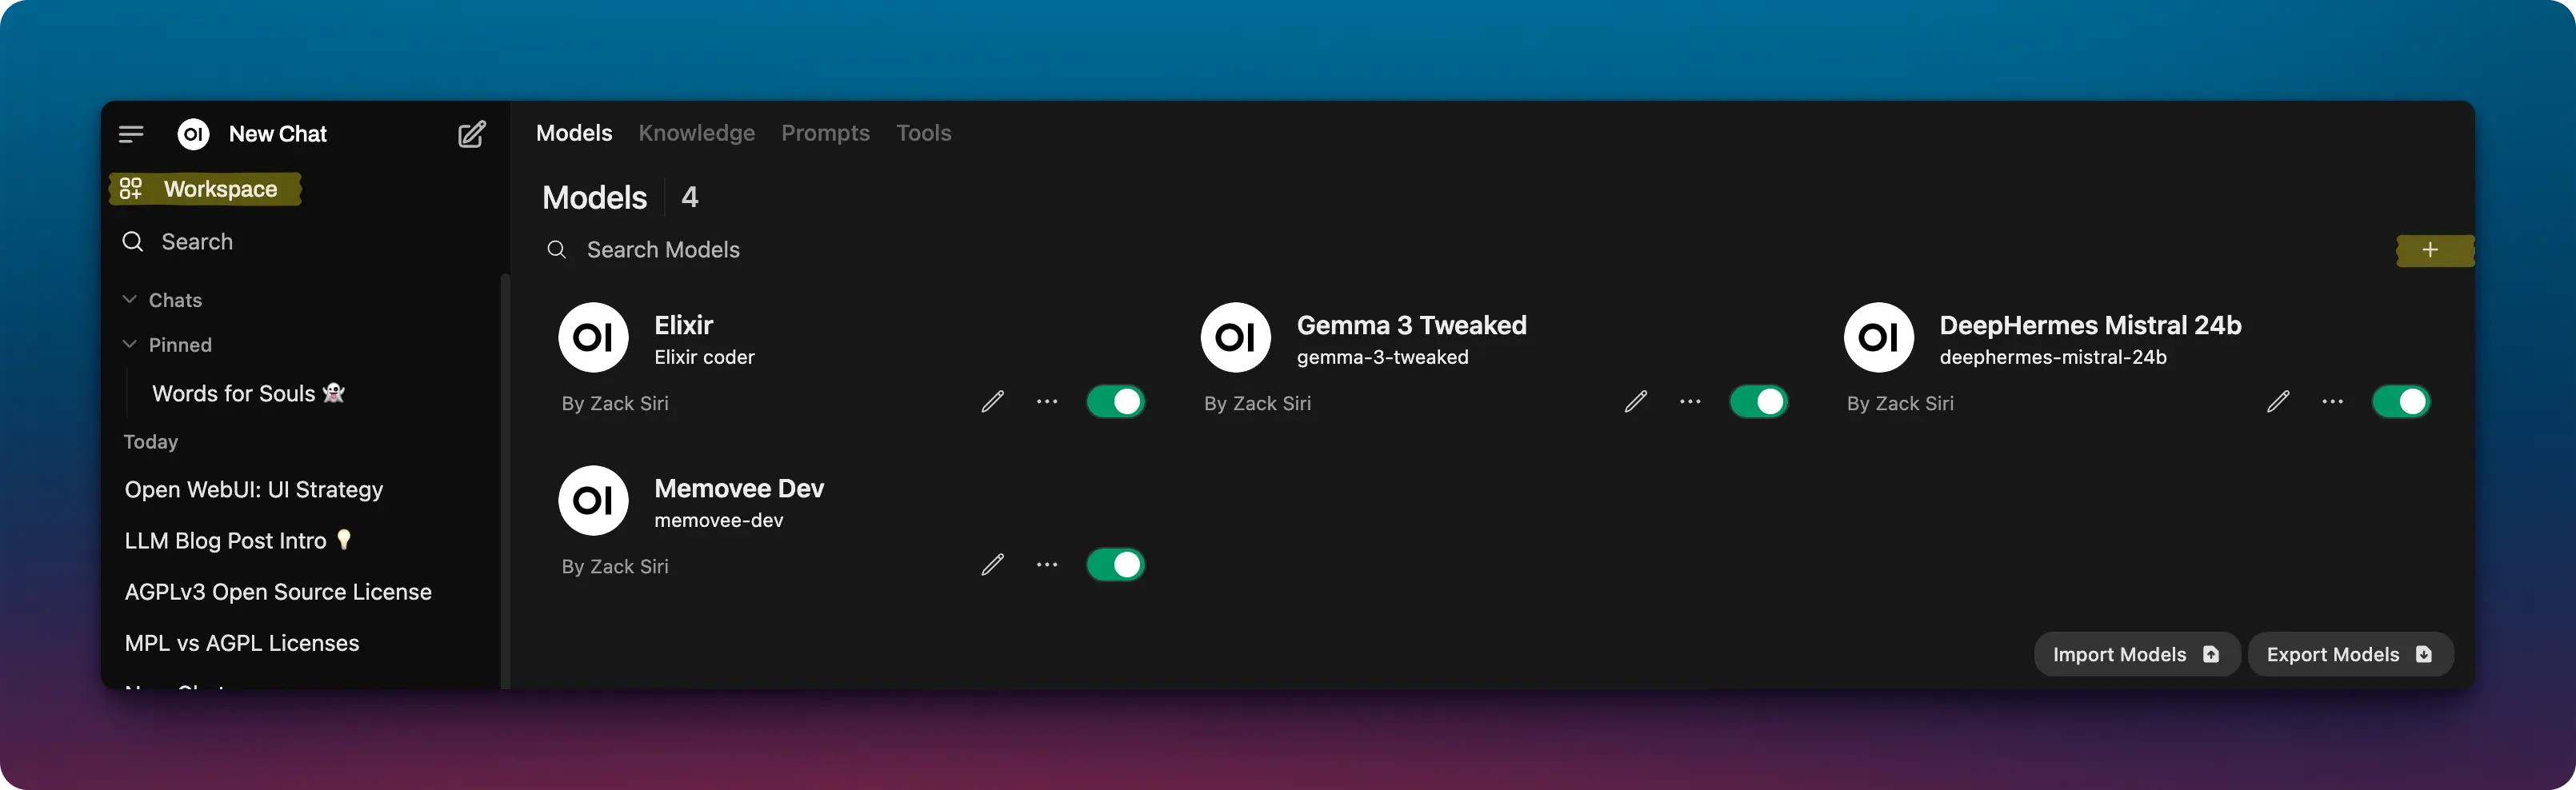
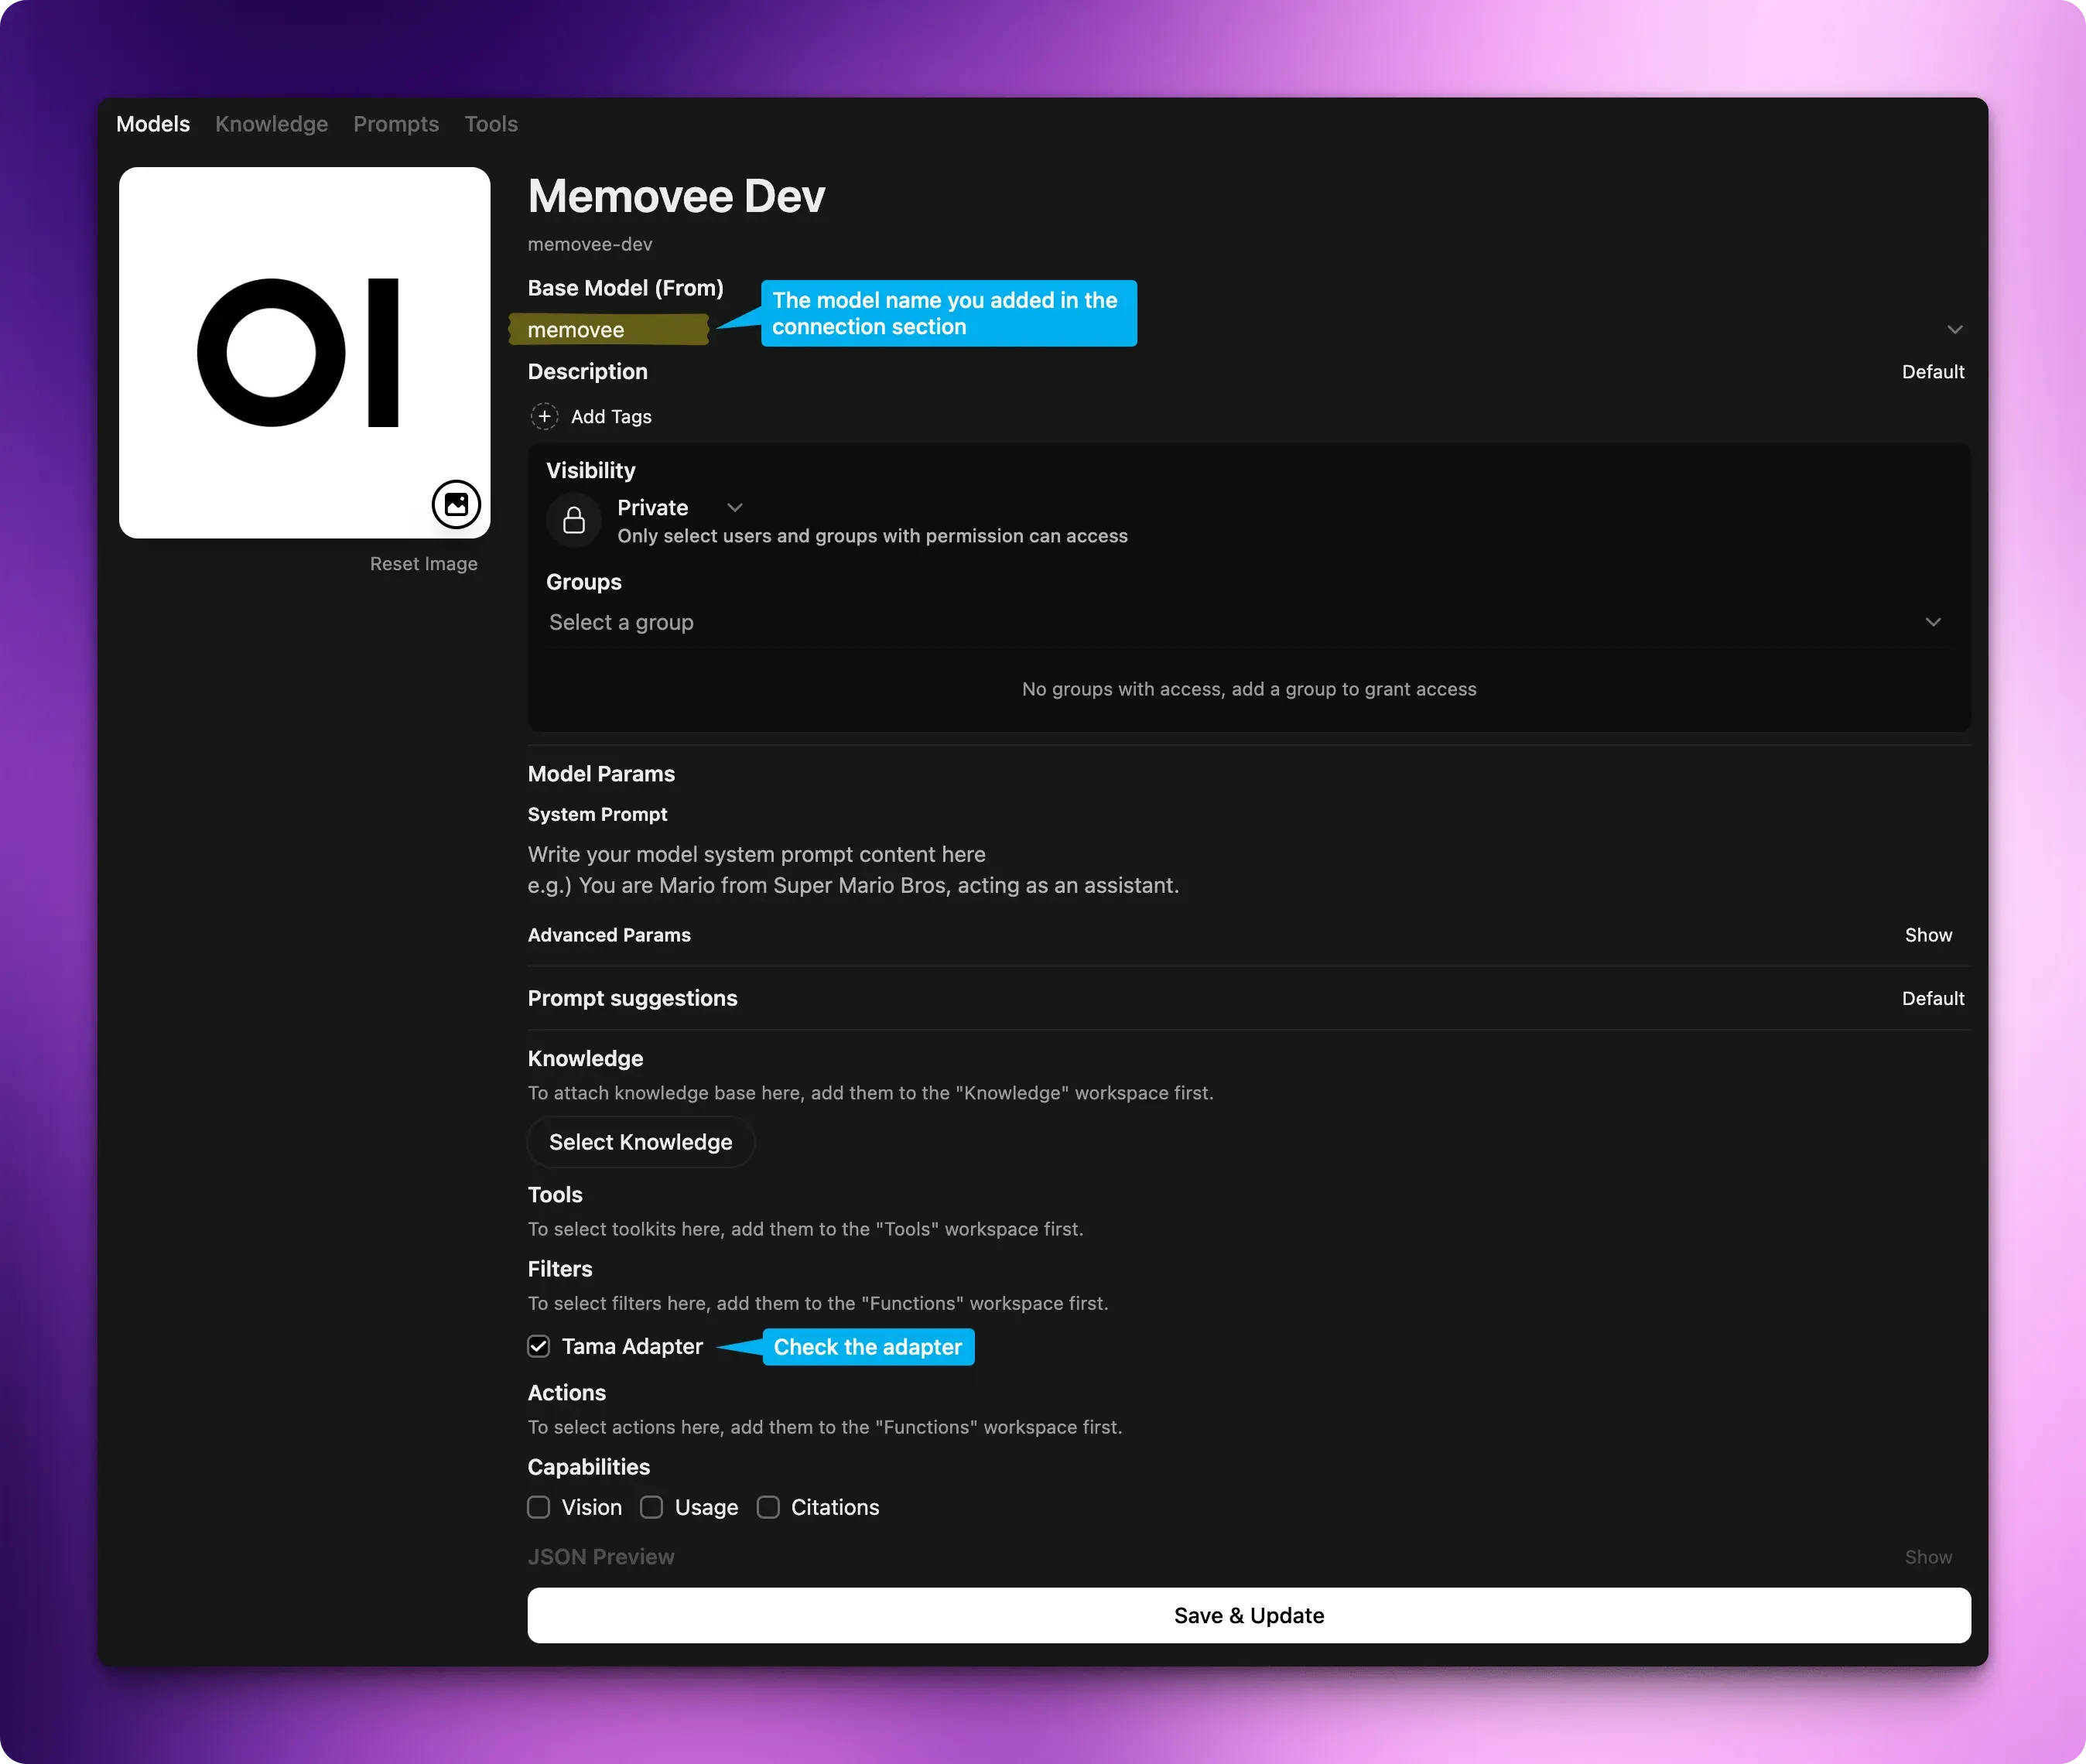
Once you create a new workspace you can configure and use the adapter / filter.
Chatting with your Model
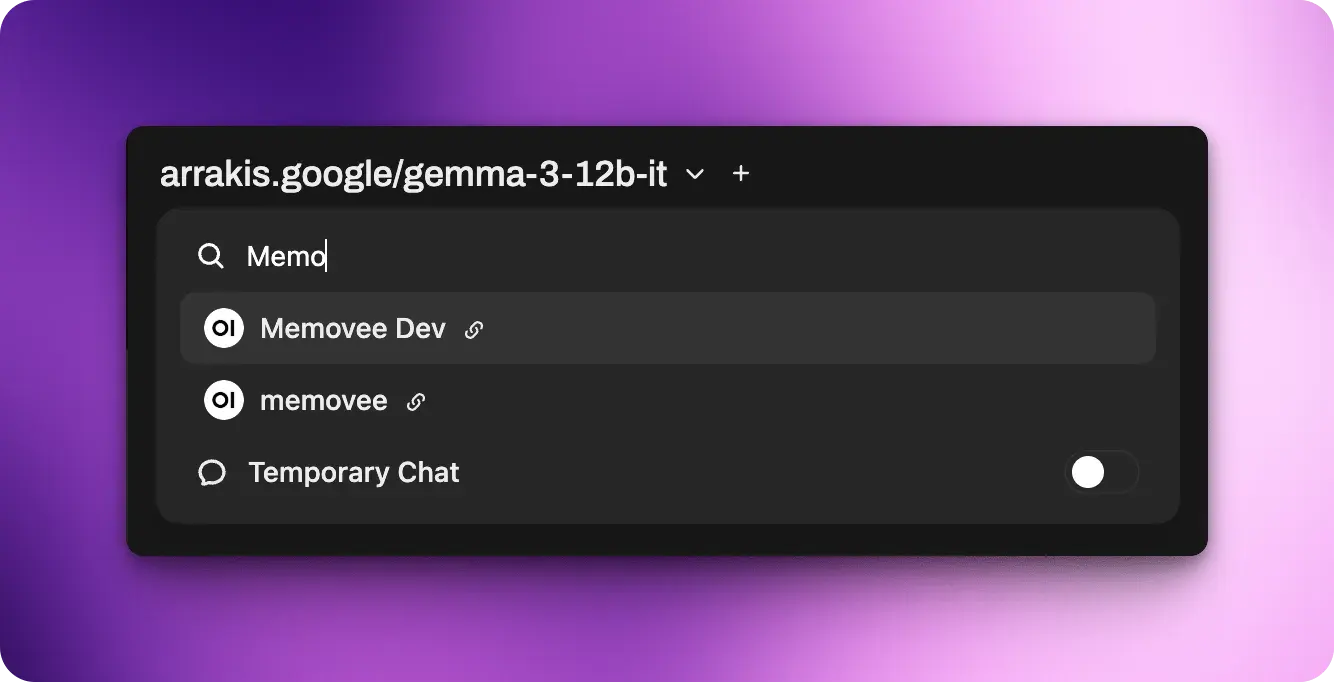
Once you’ve set everything up you can chat with your model by selecting it from the dropdown.
Chat Completion Endpoint
To allow Open WebUI to connect with my custom model engine I also built in an OpenAI compatible /chat/completions . When I type a message into Open WebUI it connects to my custom model through this endpoint and creates a message in my system. The controller adheres to SSE standards used by LLMs so it responds using the following:
conn
|> put_resp_content_type("text/event-stream")
|> put_resp_header("cache-control", "no-cache")
|> put_resp_header("connection", "keep-alive")
|> send_chunked(200)
|> setup_sse_stream("message:#{message.id}")
This keeps the connection open for the client and will wait until the message is processed and the response to be constructed.
The magic lies in the setup_sse_stream let’s take a look at what that does.
defmodule TamaWeb.SSEStream do
  def setup_sse_stream(conn, topic) do
    Phoenix.PubSub.subscribe(Tama.PubSub, topic)

    listen_for_messages(conn)
  end

  defp listen_for_messages(conn) do
    receive do
      {:chunk, chunk} ->
        chunks =
          String.split(chunk, "data:")
          |> Enum.map(&String.trim/1)

        done? = if List.last(chunks) == "[DONE]", do: true, else: false

        case Plug.Conn.chunk(conn, chunk) do
          {:ok, conn} ->
            if done? do
              conn
            else
              listen_for_messages(conn)
            end

          {:error, :closed} ->
            conn
        end

      {:tcp_closed, _} ->
        conn
    end
  end
end
Essentially what this does is it uses Phoenix’s PubSub to subscribe to a topic. In this case the topic is message:#{message.id} and then it starts a listening loop using listen_for_messages .
Whenever the LLM responds we pass the chunk and the code simply streams the response back to the client using Plug.Conn.chunk(conn, chunk) .
We then inspect each chunk to find the [DONE] message. Once we know the streaming is done, we stop listening by returning conn instead of going back into our listen_for_messages loop.
Message Processing Pipeline
Once the message is created, there is a pipeline that will do all kinds of things to that message, you could think of it as a pipeline as how the model ‘thinks’.
This is where it’s able to understand what kind of message it is and how it should respond. I won’t go into further detail in this post, suffice to say that there is a thinking pipeline and this can happen many layers deep in the stack and once all the processing is done the system calls to an LLM to generate a streaming response.
Architecture Design
Here is a more visual representation of how the message from the user is finally passed into the engine and therefore the processing pipeline.

Handling Streaming Response
Once we pass the message into the pipeline, this pipeline will usually run asynchronously. Once the processing is completed the system will call to the LLM to generate the final response back to the user. Since the main thread is subscribed to the PubSub, we can pass the message to it by using into: with Req library.
stream_handler = fn {:data, data}, context ->
  Phoenix.PubSub.broadcast(
    Tama.PubSub,
    "message:#{message.id}",
    {:chunk, data}
  )

  Agent.update(buffer, fn state -> state ++ [data] end)

  {:cont, context}
end
We simply use Phoenix.PubSub.broadcast call to stream the chunk back to the main controller thread. Since we are also tracking our own state and not relying on Open WebUI to send all the messages as a thread we will need to also store the output from the LLM. We can handle this very easily by using Agent .
We can simply start an agent using
{:ok, buffer} = Agent.start_link(fn -> [] end)We can then pass the buffer into the stream_handler and each chunk that comes in we simply append to the existing list with this line:
Agent.update(buffer, fn state -> state ++ [data] end)Once we receive a 200 from Req we can then parse the full list of chunks using the following:
message_chunks = Agent.get(buffer, fn state -> state end)

Agent.stop(buffer)

message = build_message_from_chunks(message_chunks)
The build_message_from_chunks has the following code:
defp build_message_from_chunks(message_chunks) do
  message_chunks
  |> Enum.flat_map(fn chunk ->
    chunk
    |> String.split("data:")
    |> Enum.map(&String.trim/1)
  end)
  |> Enum.reject(&(&1 in ["", "[DONE]"]))
  |> Enum.map(&Jason.decode!/1)
  |> Enum.reduce("", fn chunk, acc ->
    choice =
      chunk["choices"]
      |> List.first()

    if choice do
      acc <> get_in(choice, ["delta", "content"])
    else
      acc
    end
  end)
end
This should be able to parse streaming message from any LLM using OpenAI compatible format. Once you have the message you can persist it to your database / storage.
The Power of Elixir
The patterns and techniques used in this project felt remarkably intuitive, largely thanks to Elixir’s inherent concurrency model. Elixir’s ability to handle numerous concurrent connections allows developers to maintain open connections without concern for resource limitations – a significant advantage for LLM powered applications. Phoenix, leveraging websockets through LiveView, already demonstrates this natural capability.
Key to this ease of development were components like Phoenix.PubSub, Plug, Req, and Agent. For instance, using an Agent to buffer streaming output, can be implemented with just a few lines of code. This, combined with Elixir’s comprehensive tooling, makes building and maintaining LLM powered applications remarkably straightforward, allowing clear and logical reasoning about the application’s structure and behavior.
If you are curious to learn more or would like to ask me questions feel free to join my discord. I’ve also drawn a diagram that you can access to see how the entire flow comes together.